


Table of Contents
- The Anchor Piece Method: One Rule That Makes Any Jewelry Stack Cohesive
- How to Mix Metals and Coordinate Metal Tones in One Stack
- How to Stack Rings: Thin Bands, Midi Rings, and Proportion Rules
- Ring Stack Ideas for Minimal, Bold, and Mixed-Metal Looks
- How to Layer Necklaces Without Tangling
- How to Stack Bracelets and Bangles Without the Clutter
- Fit, Comfort, and Care: Making Your Stack Survive Daily Wear
- Conclusion: Your Five-Point Cohesion Checklist
- Frequently Asked Questions
Last Updated: October 14, 2026
The Anchor Piece Method: One Rule That Makes Any Jewelry Stack Cohesive
Learning how to build a cohesive jewelry stack starts with one decision: pick an anchor piece first.
At GRISÉ NYC, we see this play out constantly. People buy five great pieces, wear them all at once, and wonder why the look feels chaotic. The fix is not buying less.
Start with the anchor method and the rest of your stack falls into place.
How to Choose Your Anchor Piece
The anchor piece is usually your largest or most detailed item. It can be a chunky ring, a statement pendant, or a bold cuff. Ask yourself three questions:
- Which piece do I want people to notice first?
- Does it match the mood of my outfit?
- Can everything else play a supporting role?
If a piece fights for attention with your anchor, take it off. One loud piece per stack is enough. Two creates tension your eye cannot resolve.
How to Mix Metals and Coordinate Metal Tones in One Stack
Mixing metals works when you repeat each tone at least twice across the stack. A single silver piece among five gold ones looks like a mistake. Two silver pieces read as a choice.
The easiest way to mix metals is to choose a dominant tone and a secondary tone. Make the dominant tone about 70% of your stack. Let the secondary tone carry the rest.
The Two-Tone Shortcut
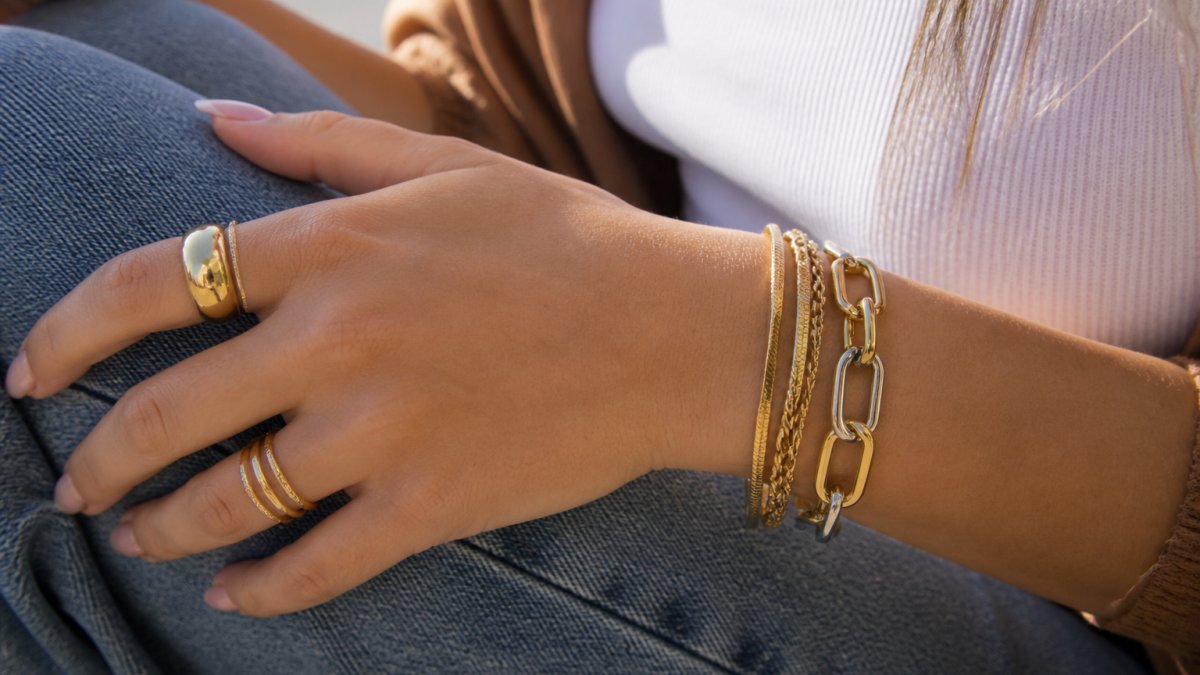
If mixing feels risky, start with a piece that already does it for you. The Two-Tone Oval Link Bracelet alternates gold and silver links in one design. It bridges both tones, so every other piece in your stack has something to connect to. Pair it with gold rings on one hand and silver on the other, and the look reads intentional.

How to Stack Rings: Thin Bands, Midi Rings, and Proportion Rules
Ring stacking follows a proportion rule: one bold ring, then thin bands. A ring stack works when the widths differ clearly. Two rings of similar thickness look accidental. A wide band next to a thin one looks designed. But proportion is only half the job, fit and comfort decide whether you actually keep wearing the stack past the first week.
Proportion Rules That Hold Up
- Vary width by at least 2 mm. A 6 mm band beside a 2 mm band reads as intentional; two 3 mm bands read as a set that lost its other half.
- Cap the stack at three rings per finger. Past three, the rings crowd the knuckle and the finger stops bending cleanly.
- Give each finger one job. If the index finger carries the bold anchor, the middle and ring fingers should carry supporting widths, not competing ones.
Fit and Comfort: The Part Most Guides Skip
A ring that fits well slides off with slight resistance over the knuckle. If you need soap, it is too tight; if it spins freely on its own, it is too loose and will slide off when your hands are cold. Two practical checks:
- Knuckle clearance: The band should pass over the knuckle with light pressure, then sit snug at the base of the finger. If the knuckle is wider than the base, common on many hands, size to the knuckle, not the base.
- Stacked bulk: Three rings stacked on one finger add roughly 4-6 mm of width. That extra width tightens the fit, so size down a half size for a three-ring stack, or spread the stack across fingers instead.
Adapting Proportions to Hand and Finger Shape
One-size-fits-all advice fails here. Adjust by shape:
- Short fingers: Favor thin bands and midi rings. A midi ring sits above the knuckle and visually lengthens the finger. Skip wide cuffs on the same hand.
- Long fingers: You can carry a wider anchor band and a second medium band without the hand looking heavy. Midi rings tend to crowd long fingers, keep them to one, or skip them.
- Wide knuckles: Choose open or adjustable bands, or a slightly larger size, so the ring clears the knuckle without pinching the base.
For placement, spread rings across fingers instead of crowding one hand. Try this layout:
- Index finger: your boldest ring
- Middle finger: a medium band
- Ring finger: a thin band or midi ring
For a bold anchor, the Triple Band 18k Gold Ring does the work of three rings in one. It stacks cleanly with thin bands and mixes well with silver.

Ring Stack Ideas for Minimal, Bold, and Mixed-Metal Looks
Three ring stack ideas cover most personal styles. Pick the one that matches your wardrobe, not the one trending online.
Minimal: One thin band per hand, plus one midi ring. Keep all metals the same. This look suits office settings and everyday wear.
Bold: One chunky ring as the anchor, plus two thin bands on the same hand.
Mixed-metal: Alternate gold and silver bands on one hand. The Double Pearl 18k Gold Stackable Ring adds texture without adding width, which keeps a mixed stack from feeling heavy.

| Style | Rings Per Hand | Metal Rule | Best For |
|---|---|---|---|
| Minimal | 1-2 | One tone only | Work, daily wear |
| Bold | 2-3 | One tone, varied widths | Evenings, events |
| Mixed-metal | 2-3 | Repeat each tone twice | Streetwear, weekends |
How to Layer Necklaces Without Tangling
Layering necklaces without tangling comes down to length spacing. Keep at least 2 inches between each chain. Chains that sit at the same length will twist together within an hour.
A simple three-chain formula:
- Choker or short chain at 14-16 inches
- Pendant necklace at 18-20 inches
- Longer chain at 24-30 inches
Vary the weight too. A thin chain next to a heavier one tangles less than two thin chains together. If you wear a pendant, make it the anchor of the neckline and keep the other chains plain.
How to Stack Bracelets and Bangles Without the Clutter
Bracelet stacks stay clean when you cap them at three to five pieces per wrist. Past five, the wrist looks crowded and the pieces scratch each other. Mix textures rather than piling on more of the same.
A balanced bracelet stack usually includes:
- One structured piece, like a link bracelet or cuff
- One or two thin chains
- One textured piece, like a beaded or woven band
Fit First: Stop the Sliding and Catching
Most bracelet stacks fail on fit, not style. Three checks before you commit:
- Slack: You should fit one finger between the bracelet and your wrist. Tighter than that and the piece digs in when you flex your hand; looser and it slides down over your hand.
- Wrist size: Measure your wrist just below the wrist bone with a soft tape. Add about 0.5 inch for a snug fit, or 1 inch for a relaxed drape. A stack of three to five pieces adds bulk, so size the largest piece to your wrist and let the thinner ones sit slightly looser.
- Sleeve clearance: Cuffs and wide bangles catch on long sleeves. If you wear long sleeves often, keep the widest piece closest to the wrist bone, where it moves least.
Preventing Abrasion Between Pieces
Metal-on-metal contact is what dulls finishes and scratches stones over time. A few habits prevent most of it:
- Separate hard from soft. Keep a chunky link bracelet from rubbing directly against a thin chain or a beaded band. Put a smooth piece between them, or wear them on opposite wrists.
- Mind the stones. A bracelet with a raised stone setting will scratch the piece next to it. Wear stone-set bracelets alone or beside a smooth band.
- Rotate, don't pile. Wearing the same five pieces every day accelerates wear. Rotating two or three at a time spreads the contact and keeps each piece looking newer longer.
When to Take It Off
Even durable pieces have limits. Remove bracelets before heavy lifting, gardening, or any activity that puts direct pressure on the wrist. Chlorine and salt water are hard on plated finishes over time, so rinse and dry pieces after swimming.
If you wear a watch, treat it as one of your pieces and count it in the total. A metal watch band is the hardest surface on the wrist, give it its own space and keep softer pieces away from it.
Fit, Comfort, and Care: Making Your Stack Survive Daily Wear
Comfort decides whether a stack survives daily wear. A stack that pinches, catches on sleeves, or slides off gets left in a drawer within a week. Fit comes before style.
Check these three things before you commit to a stack:
- Ring fit: Rings should slide off with slight resistance. If you need soap to remove one, it is too tight.
- Chain length: Your longest chain should sit above your neckline, not inside it.
- Bracelet slack: You should fit one finger between the bracelet and your wrist.
Materials matter just as much. Pieces made from 18k gold plating over stainless steel hold up to water, sweat, and daily wear far better than standard plated jewelry, which tends to flake and discolor.
Care is simple. Wipe pieces with a soft cloth after wear, store them separately so they do not scratch, and skip harsh cleaners.
Conclusion: Your Five-Point Cohesion Checklist
Run this checklist before you leave the house:
- One anchor piece, clearly the boldest item
- Each metal tone repeated at least twice
- Ring widths varied, not matched
Build your stack around durable pieces and it will hold up as well as it looks. GRISÉ NYC makes 18k gold-plated stainless steel jewelry designed for everyday wear, with waterproof, tarnish-free finishes, hypoallergenic materials, and bold designs made to anchor a stack. Add to cart and start with one piece that sets the tone.
Frequently Asked Questions
How do you make a jewelry stack look cohesive?
Start with one anchor piece, usually the boldest item you own, then build outward using a shared metal tone, texture, or motif. A cohesive jewelry stack repeats at least one element across every piece: the same finish, the same scale, or the same color family. Vary the rest. For example, pair a triple band 18k gold ring with thin gold bands and a gold-plated bracelet, then add one silver accent for contrast. The repetition creates intention; the variation keeps it from looking flat.
Can you mix gold and silver jewelry in a stack?
Yes, and mixed metals often look more modern than a single-tone stack. The trick is to distribute both tones evenly rather than clustering all gold on one hand and all silver on the other. A two-tone bracelet with alternating gold and silver links does the coordinating for you. If you are layering necklaces, keep the chain lengths varied so the metals read as deliberate rather than accidental. Two metals is the sweet spot; three or more starts to look unresolved.
How many pieces should you wear in a jewelry stack?
There is no fixed number, but the practical ceiling is the point where pieces start colliding or catching on clothing. A workable everyday formula is one anchor piece, two to three supporting pieces per zone (rings, necklaces, bracelets, earrings), and one zone left minimal. That gives you roughly five to eight pieces total. Active readers who swim or train in their jewelry should stay at the lower end, since fewer pieces means fewer clasps and stones to check.
How do you build a comfortable ring stack?
Size each ring to the finger it sits on, not to the stack as a whole. Midi rings should fit snugly enough to stay put but not leave marks. Keep the total band width under roughly 10mm per finger so your knuckles can still bend, and put the widest band closest to the base of the finger where there is more room. Waterproof, tarnish-free pieces such as 18k gold-plated stainless steel rings hold up better to daily wear than plated brass, which can flake within months.
Building a cohesive jewelry stack takes a clear anchor, balanced metals, and pieces that survive real life. GRISÉ NYC offers 18k gold-plated stainless steel jewelry that is waterproof, tarnish-free, and hypoallergenic, so your stack holds up through workouts, showers, and long days. Start with the Triple Band 18k Gold Ring or the Two-Tone Oval Link Bracelet and build outward from there. Get started with GRISÉ NYC and wear a stack that looks intentional every day.


